

Modeling clay has long been a beloved medium for artists, offering endless possibilities for creativity and expression. From ancient civilizations to modern-day sculptors, this versatile material has evolved significantly, showcasing the artistry of cultures worldwide. Whether you’re a beginner or a seasoned artist, understanding the rich history and various types of modeling clay can inspire your next creative endeavor.
This exploration will take you through the fascinating evolution of modeling clay, its diverse types, essential tools, effective sculpting techniques, and even project ideas that spark imagination. You’ll also discover crucial tips for finishing your creations and ensuring a safe, enjoyable crafting experience. Join us as we delve into the world of modeling clay and unleash your inner artist!
The history and evolution of modeling clay as an art medium
Modeling clay has a rich and varied history, serving as a versatile medium for artists across cultures and eras. From ancient civilizations to modern-day creative expression, modeling clay has evolved significantly, both in its composition and in the techniques associated with its use. This exploration of modeling clay’s journey reveals its integral role in artistic practice and cultural expression throughout human history.
The origins of modeling clay can be traced back to ancient Mesopotamia, where early potters utilized natural clay for creating functional pottery. Over time, this material gained popularity in various cultures, including the Egyptians, who used clay for both practical and ceremonial purposes. The Chinese also contributed significantly to the evolution of clay as an art medium, developing techniques for sculpting and pottery that would influence generations. As societies advanced, so did the complexity of clay usage, paving the way for artistic innovations.
Key milestones in the development of modeling clay materials and techniques
The evolution of modeling clay has seen numerous significant advancements, particularly in terms of materials and artistic techniques. Understanding these milestones provides insight into how the medium has become a staple in artistic expression.
- The introduction of oil-based and water-based clays in the 19th century allowed artists a broader range of working properties, making clay more accessible for detailed sculptures.
- The invention of polymer clay in the mid-20th century represented a watershed moment, as this synthetic material offered unprecedented durability and color retention, transforming how artists approached modeling clay.
- The rise of ceramics as a formal art medium in the early 20th century led to increased focus on clay as a sculptural element, inspiring movements such as the Arts and Crafts movement, which celebrated handmade craftsmanship.
Notable artists and movements have prominently featured modeling clay throughout history, shaping its perception in the art world. For instance, the Italian sculptor Alberto Giacometti utilized clay in his exploration of human figures, creating elongated forms that resonate with existential themes. Additionally, the American artist Peter Voulkos revolutionized ceramics in the 1950s and 1960s, embracing abstraction and spontaneity in his clay works, thereby challenging traditional perceptions of pottery and sculpture.
“Clay is the most versatile medium, allowing for both functional and sculptural creations that reflect the spirit of the times.”
In contemporary art, modeling clay continues to thrive, with artists experimenting with mixed media and integrating traditional techniques with modern aesthetic sensibilities. The ongoing evolution of modeling clay as an art medium illustrates its enduring relevance and adaptability, bridging the gap between historical practices and future innovations.
Understanding different types of modeling clay available in the market
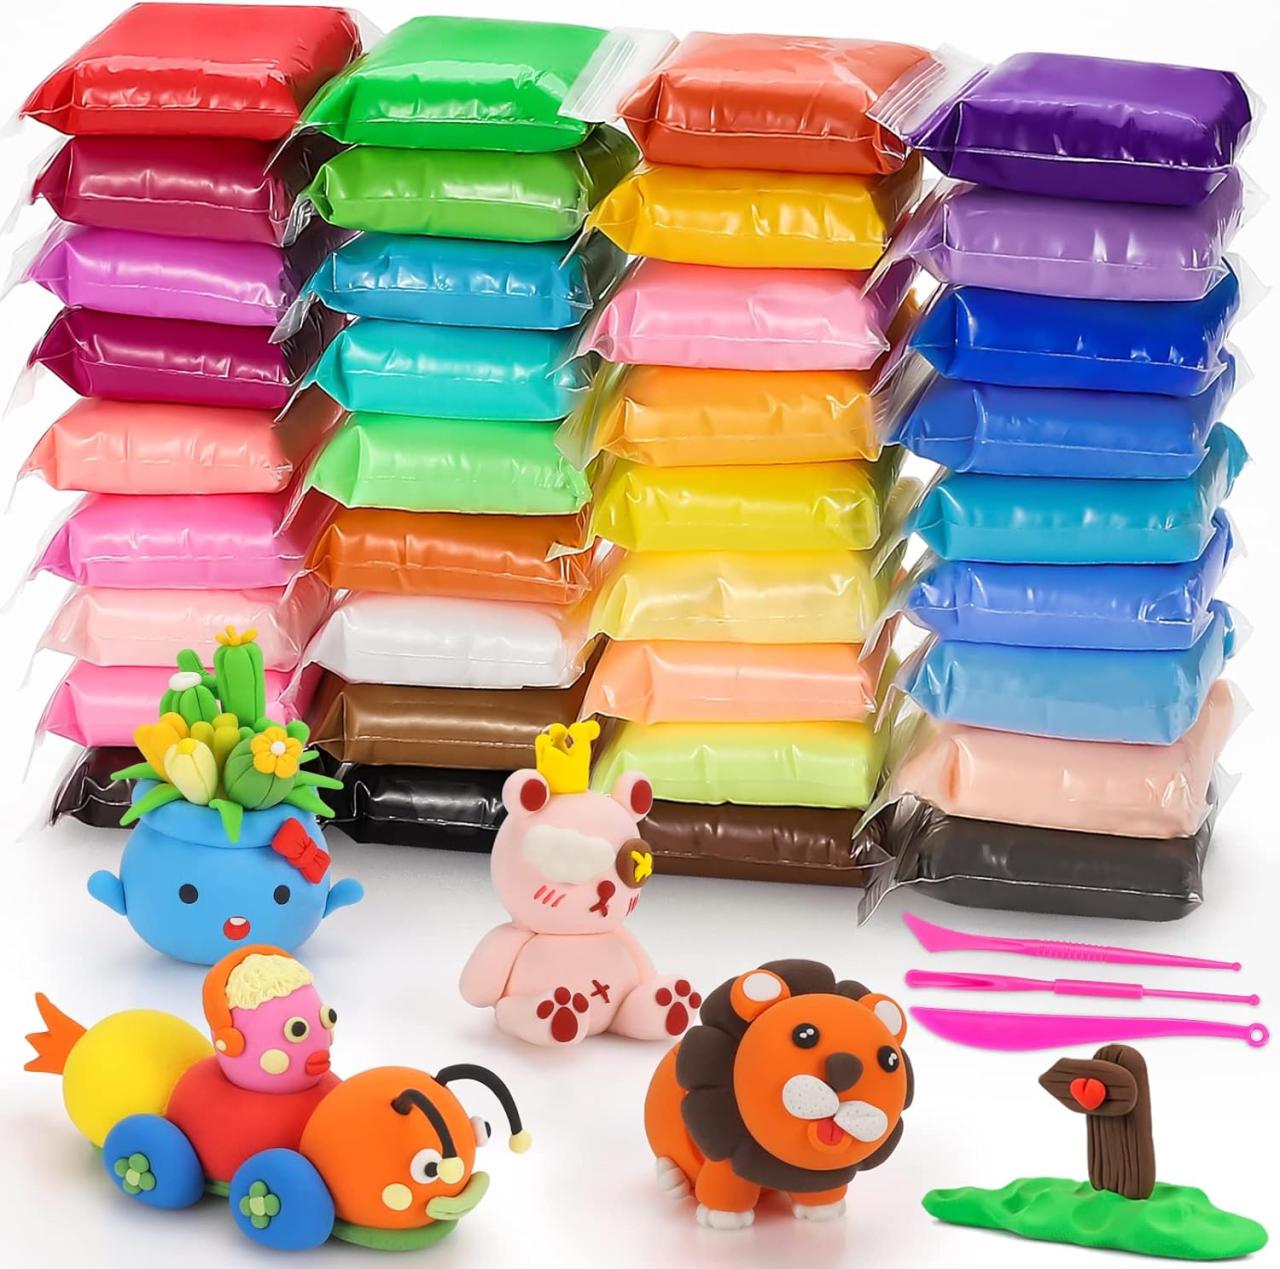
Modeling clay comes in various forms, each tailored to specific artistic needs and project requirements. This diversity allows artists, hobbyists, and crafters to select the ideal clay that aligns with their creative vision. To navigate through the options available, it is essential to familiarize oneself with the properties and uses of different types of modeling clay, such as polymer clay, air-dry clay, and natural clay.
Types of Modeling Clay
There are three primary types of modeling clay that stand out in the market, each with unique characteristics and applications. Understanding these types helps artists make informed decisions.
- Polymer Clay: A versatile and popular choice among artists, polymer clay is a synthetic material that hardens when baked in an oven. It is available in various colors and can be easily blended to create custom shades. Artists appreciate its flexibility, durability, and the variety of tools available for sculpting. It is ideal for detailed work such as jewelry, miniatures, and figurines.
- Air-Dry Clay: Unlike polymer clay, air-dry clay hardens when exposed to air, eliminating the need for an oven. This type of clay is often preferred for larger projects, as it can be molded and shaped without the constraints of baking time. It is suitable for crafts, sculptures, and decorative items. However, it may not be as durable as polymer clay once fully dried.
- Natural Clay: This traditional form of modeling clay is typically made from organic materials, making it a favorite among potters and sculptors. Natural clay can be fired in a kiln, transforming it into pottery or sculptures that are both functional and artistic. While it offers excellent textural qualities and is biodegradable, it often requires more skill and additional equipment for proper use.
Comparison of Properties and Uses
When choosing the right clay, it is crucial to consider the specific properties and ideal applications for each type.
| Type of Clay | Properties | Best Uses | Benefits | Limitations |
|---|---|---|---|---|
| Polymer Clay | Flexible, durable, variety of colors | Jewelry, miniatures, detailed sculptures | Easy to mold, non-toxic, can be painted | Requires baking, can be brittle if overbaked |
| Air-Dry Clay | Non-toxic, easy to manipulate, hardens without heat | Craft projects, home decor, sculptures | No baking required, lightweight, great for beginners | Less durable, may crack if not stored properly |
| Natural Clay | Organic, requires kiln firing | Pottery, sculptures, artistic works | Eco-friendly, excellent for textural work | Requires skill, additional equipment needed |
In summary, each type of modeling clay offers distinct benefits and limitations. Artists should consider their project requirements, skill level, and desired outcomes when selecting the appropriate clay. Understanding these factors ensures a more enjoyable and successful creative process.
Essential tools and materials for working with modeling clay
When diving into the world of modeling clay, having the right tools and materials can significantly enhance your sculpting experience. The tools you choose not only influence the ease of your work but also the quality and detail of your final piece. This guide will explore the essential tools every sculptor should consider, as well as tips for selecting high-quality materials.
Essential tools for sculpting with modeling clay
Understanding the tools available can empower you to create intricate designs and perfect your technique. Here’s a comprehensive list of essential tools and their functions:
- Clay Knife: A sharp tool for cutting, slicing, and trimming clay. It allows for precise edge work and can help shape fine details.
- Wire End Tool: This tool features a looped wire that is ideal for removing bulk clay and creating smooth surfaces.
- Ball Stylus: Used for adding texture and details, the ball stylus comes in various sizes to create different effects on your clay.
- Rake Tool: A tool that helps in adding texture and patterns, particularly useful for simulating fur or other natural textures.
- Wooden Modeling Tools: These are versatile tools with different ends, great for shaping and smoothing clay without leaving fingerprints.
- Rolling Pin: Essential for flattening out the clay to a consistent thickness, especially useful in creating sheets of clay for layering.
- Brushes: Soft brushes can be used for smoothing surfaces and applying water to help with blending seams or textures.
- Clay Extruder: A tool that pushes clay through a variety of molds to create specific shapes and designs.
- Sculpting Sponge: This can be dampened and used to smooth out surfaces and eliminate fingerprints, giving a polished finish to your work.
Selecting high-quality tools and materials
Choosing high-quality tools and materials can make a significant difference in both the process and the outcome of your sculpting projects. Here are some important considerations:
- Material Quality: Look for tools made from durable materials such as stainless steel or hardwood. These materials tend to last longer and provide better results.
- Ergonomics: Select tools that feel comfortable in your hand. Ergonomically designed tools can reduce fatigue during long sculpting sessions.
- Variety: Invest in a range of tools to allow for versatility in your projects. A diverse toolset encourages creativity and experimentation.
- Brand Reputation: Research brands known for quality in sculpting tools. User reviews and recommendations can guide you towards reliable options.
- Cost vs. Quality: While budget tools may be tempting, investing in higher-quality tools often pays off in the long run with better performance and durability.
Influence of tools on technique and outcomes
The choice of tools can dramatically influence your sculpting technique and the final appearance of your work. Here’s how:
- Precision: Fine detailing tools like the ball stylus and clay knife allow for intricate designs that elevate the overall quality of the sculpture.
- Texture Creation: Tools like the rake and brushes enable the sculptor to manipulate the surface of the clay, adding depth and realism to the work.
- Efficiency: Well-chosen tools can streamline the sculpting process, making it easier to achieve desired shapes and textures without unnecessary effort.
- Alteration of Technique: Different tools encourage different techniques. For example, using a clay extruder can lead to a focus on creating uniform shapes that might be difficult by hand.
- Final Finish: The smoothing tools and sponges can greatly affect the surface finish, leading to a more polished and professional-looking end product.
Techniques for sculpting with modeling clay effectively
Sculpting with modeling clay is an art that allows for endless creativity and expression. Understanding various techniques can elevate your creations, enabling you to craft intricate designs and textures. This section delves into effective sculpting techniques, layering, blending, and shaping clay to achieve the desired effects, while also highlighting common pitfalls beginners should avoid.
Layering Techniques for Depth and Detail
Layering is an essential technique in clay sculpting that adds dimension and complexity to your work. By building up layers, sculptors can create realistic textures and forms. When using this technique, it’s important to ensure that each layer adheres properly to the previous one. Here are some methods to effectively layer clay:
- Use of Slip: Slip, a mixture of clay and water, serves as an excellent adhesive between layers. Apply slip on the area to be joined before adding the next layer.
- Pressure Application: Gently press and smooth the edges of each layer into the previous one to prevent air pockets and ensure a seamless bond.
- Texturing Between Layers: Before adding a new layer, consider texturing the surface with tools or fingers to enhance adhesion and create interesting visuals.
Blending Techniques for Smooth Transitions
Blending is key for achieving smooth transitions between different sections of your sculpture. This technique is vital in creating lifelike forms and avoiding harsh lines. Consider the following methods when blending:
- Using Water: Lightly moisten your fingers or tool to help blend clay smoothly. Water reduces friction and allows for easier manipulation.
- Smoothing Tools: Tools such as a damp sponge or a soft brush can help blend edges effectively, creating a more natural appearance.
- Patience is Key: Take your time blending, as rushing can lead to uneven surfaces. Gradually work the clay until you achieve the desired smoothness.
Shaping Techniques for Desired Effects
Shaping is fundamental when sculpting with modeling clay, as it determines the overall form of the piece. Employing various shaping techniques can help achieve distinct styles and effects. Here are some effective shaping techniques:
- Pinching: Use your fingers to pinch the clay into various shapes. This method is great for forming organic shapes like leaves or petals.
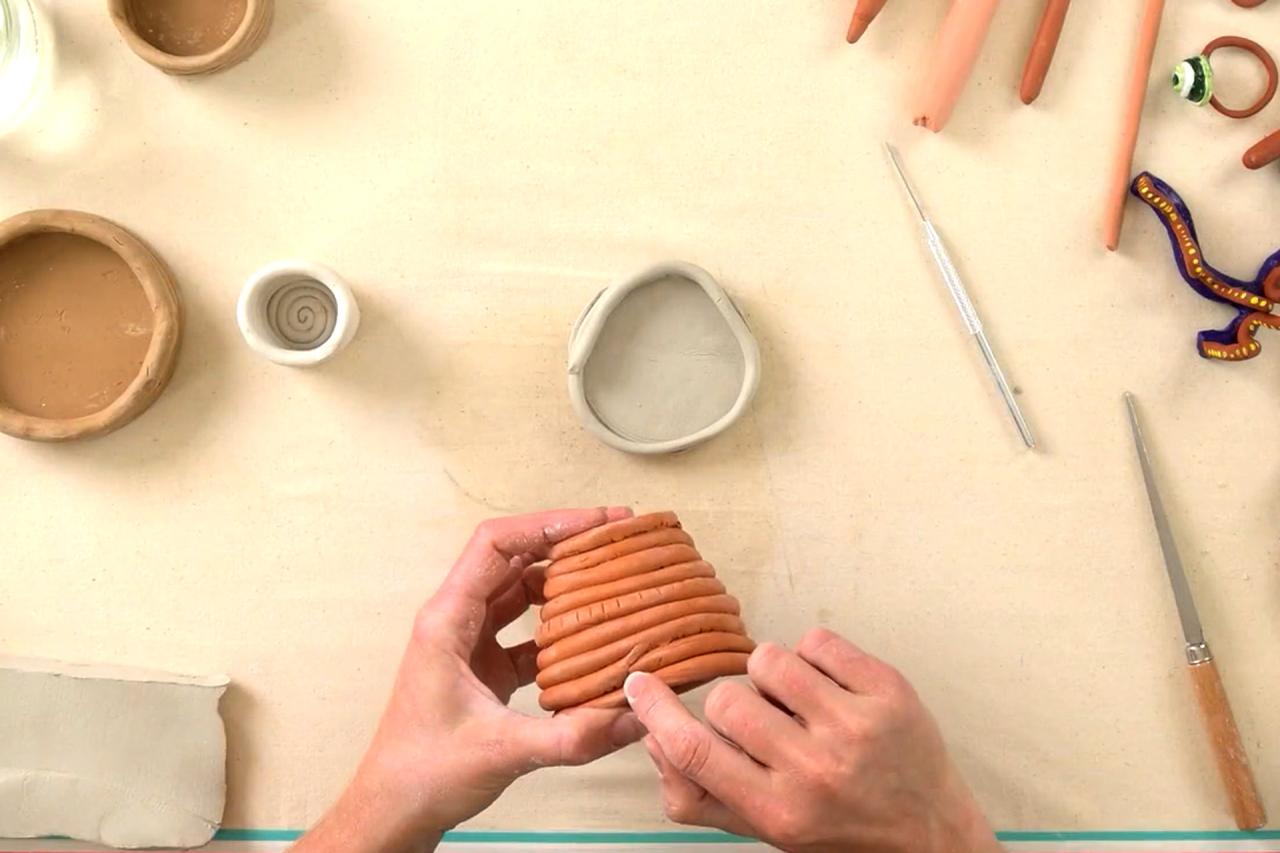
- Coiling: Roll clay into long strands and layer them to create cylindrical shapes or intricate designs, such as pottery forms.
- Carving: After shaping your piece, tools can be used to carve details into the surface, adding depth and intricacy.
Common Mistakes and How to Avoid Them
Beginners often encounter specific challenges when sculpting with modeling clay. Recognizing these common mistakes can lead to improved results. Here are pitfalls to watch out for:
- Ignoring Drying Time: Allowing clay to dry too quickly can lead to cracking. Control the drying process by covering your work or using a humid environment.
- Inadequate Support: Sculptures without internal support risk collapsing. Use armatures or internal structures to maintain stability.
- Overworking the Clay: Excessive handling can lead to a loss of texture and detail. Work with the clay as needed, but avoid unnecessary manipulation.
Creative project ideas for using modeling clay in art
Modeling clay offers a versatile medium for artists of all skill levels to express their creativity. Its malleable nature allows for endless possibilities, making it an excellent choice for both simple and intricate projects. Whether you’re a beginner or looking to challenge your skills, the following unique project ideas will inspire you to dive into the colorful world of modeling clay.
Exploring creative projects with modeling clay can lead to an exciting journey of self-expression. Each project varies in complexity, encouraging artists to adapt and personalize their creations. Below are several ideas, organized by skill level, with detailed steps to help guide your artistic endeavors.
Beginner Projects
For those just starting out with modeling clay, simple projects can help build foundational skills and boost confidence.
- Clay Beads: Create unique beads for jewelry or decor. Roll small pieces of clay into balls and use a toothpick to make holes. Bake according to package instructions to harden.
- Miniature Plants: Craft cute succulents or flowers. Shape the clay into leaves and petals, and arrange them as desired. Color can be added with paint after baking.
- Fridge Magnets: Form small shapes or figures, attach a magnet on the back, and bake. These can be customized with colors or textures for added flair.
Intermediate Projects
With some basic skills under your belt, you can tackle these more challenging projects that incorporate additional techniques.
- Figurines: Sculpt a simple character or animal. Start by forming a base shape, then add details like facial features or clothing using tools or your fingers. Be sure to blend seams for a smooth finish.
- Pots and Planters: Create decorative pots by rolling out slabs of clay and shaping them into desired forms. Consider adding texture or patterns for visual interest. After baking, these can be painted or left natural.
- Custom Coasters: Roll out clay into circles and use stamps or tools to create patterns. Bake and then seal with a varnish for a functional and artistic home accessory.
Advanced Projects
For seasoned artists, these intricate projects allow for advanced techniques and creativity.
- Tabletop Sculptures: Construct a multi-piece sculpture. Begin with a strong base and build upwards, ensuring stability. Use armatures if necessary, and experiment with mixed media for added depth.
- Functional Art: Create a unique piece of furniture or décor, such as a lamp base or wall art. Consider how light and space interact with your work, and use clay to enhance these elements.
- Character Design: Develop a complex character for a story or game. Focus on proportions, expressions, and clothing details. Consider using a wire armature for support and easy positioning.
“Art is not freedom from discipline, but disciplined freedom.” – John F. Kennedy
Every project provides a canvas for your imagination. Feel free to experiment with colors, textures, and styles to make each creation uniquely yours. Let your artistic instincts guide you, and enjoy the satisfying process of bringing your ideas to life with modeling clay.
Tips for painting and finishing modeling clay creations
Painting and finishing your modeling clay creations can elevate them from simple sculptures to stunning works of art. The right techniques and materials can significantly enhance the aesthetic appeal and durability of your projects. Whether you’re looking to add a splash of color or ensure your work withstands the test of time, this guide will provide you with valuable insights.
Suitable paints and finishes for modeling clay
Choosing the right paints and finishes is crucial for achieving a professional look. Various types of paints work effectively on modeling clay:
- Acrylic Paint: This is the most common choice for painting clay, as it adheres well, dries quickly, and is water-based. It’s available in a wide array of colors.
- Oil Paint: While oil paints provide rich colors and textures, they take longer to dry and may require a primer for better adhesion.
- Spray Paint: A quick option for even coverage, spray paints can be used for larger pieces. Always use in a well-ventilated area.
- Paint Markers: Ideal for detailed work and fine lines, paint markers are easy to use and provide precision.
Preparing the clay surface for painting
Proper surface preparation is essential for achieving a smooth and professional finish. Here’s a step-by-step guide:
- Ensure the clay is fully cured: Once your sculpture is shaped, allow it to dry completely according to the clay’s instructions. This may take several hours to a few days depending on thickness.
- Sand the surface: Once dry, gently sand the surface with fine-grit sandpaper to eliminate any imperfections and create a smooth base for painting.
- Clean the surface: Wipe away any dust or debris with a damp cloth. Making sure the surface is clean will ensure better paint adhesion.
- Apply a primer (optional): If using oil paints or if you want enhanced color vibrancy, apply a layer of acrylic primer suitable for your clay type and let it dry completely.
Best practices for sealing and protecting finished pieces
To ensure the longevity and durability of your painted creations, sealing them is essential. Follow these best practices:
- Choose the right sealer: Use a clear acrylic sealer for a protective coat that enhances the colors without altering the finish. Available in matte, gloss, and satin finishes, select one that suits your desired look.
- Apply in thin layers: When sealing, apply multiple thin layers rather than a thick coat. Allow each layer to dry completely before applying the next.
- Avoid heavy handling: After sealing, handle your pieces gently. This will prevent scratches and damage to the finish.
- Store properly: Keep your finished pieces in a cool, dry place away from direct sunlight to maintain their integrity over time.
Proper sealing and care will greatly extend the life and beauty of your modeling clay creations.
Safety considerations and best practices when working with modeling clay
Working with modeling clay can be a fun and creative experience, but it’s essential to prioritize safety and maintain a clean workspace. This section addresses important safety measures and best practices that enhance your crafting experience while minimizing risks.
Safety measures for handling modeling clay and tools
When working with various types of modeling clay and tools, it is crucial to adopt specific safety measures. Different types of modeling clay, such as polymer clay or air-dry clay, may have unique properties that require attention.
- Read labels and safety data sheets: Always check the packaging for any safety warnings or recommendations, especially for polymer clays that may release harmful fumes when baked.
- Use tools safely: Utilize cutting tools, sculpting tools, and other sharp instruments carefully to avoid accidents. Always cut away from your body and keep tools stored safely when not in use.
- Work in a well-ventilated area: Ensure your workspace is well-ventilated, especially if you are using materials that can release fumes, like certain polymer clays.
Best practices for maintaining a clean and safe workspace
A clean workspace contributes significantly to both safety and the quality of your projects. Keeping your area organized can prevent accidents and ensure that you can focus on your creativity.
- Clear your workspace: Regularly clear away unnecessary materials and clutter from your work surface to avoid accidents and distractions.
- Use protective coverings: Employ newspapers, plastic sheets, or dedicated craft mats to protect your workspace from clay stains and damages.
- Clean tools immediately: After using tools, clean them promptly to prevent clay residue from hardening and becoming difficult to remove.
Proper storage of modeling clay
To prolong the lifespan of your modeling clay and to prevent contamination or spoilage, proper storage techniques should be employed.
- Seal in airtight containers: Store modeling clay in airtight containers to prevent exposure to air, which can lead to drying and hardening.
- Keep in a cool, dry place: Ensure that your clay is stored in a cool and dry environment, away from direct sunlight and extreme temperatures. This will help maintain its pliability.
- Avoid mixing different types of clay: If you work with various types of modeling clay, be cautious not to mix them during storage, as this can lead to degradation of the materials.
“Safety is not just a priority, but a responsibility when engaging in creative activities.”
The role of modeling clay in educational settings and therapeutic practices
Modeling clay serves as a versatile tool in both educational environments and therapeutic settings. Its tactile nature and malleability encourage creativity and learning while providing a medium for self-expression and emotional exploration. By integrating modeling clay into various activities, educators and therapists can enhance fine motor skills, inspire innovation, and promote emotional well-being.
The benefits of using modeling clay in educational settings are significant, especially for young learners. Engaging with clay helps to develop fine motor skills, which are crucial for tasks such as writing, using scissors, and other hand-eye coordination activities. Moreover, the process of molding and shaping clay fosters creativity, allowing children to express their ideas visually. This hands-on activity encourages problem-solving and critical thinking as students experiment with forms and structures.
Benefits of modeling clay in educational settings
Incorporating modeling clay into educational activities can greatly enhance the learning experience. Below are some key benefits:
- Enhancement of fine motor skills: Manipulating clay improves hand strength and dexterity, essential for daily tasks.
- Fostering creativity: Students can create diverse shapes, enhancing their imaginative thinking and artistic expression.
- Encouragement of teamwork: Group activities involving clay promote collaboration and communication among peers.
- Cognitive development: Working with clay supports spatial awareness and problem-solving as students design and construct their projects.
Modeling clay also finds a significant role in therapeutic practices. It can serve as an effective medium for emotional expression and stress relief. Through tactile interaction with clay, individuals can explore feelings that may be difficult to articulate verbally, making it a valuable tool for both children and adults in therapy.
Utilization of modeling clay in therapeutic practices
The therapeutic benefits of modeling clay extend to various activities and exercises designed to facilitate emotional healing and relief from stress. Here are some practical applications:
- Emotional expression: Clients can create figures or shapes that represent their feelings, providing a non-verbal outlet for emotions.
- Stress relief: The act of kneading and shaping clay can be meditative, helping to reduce anxiety and promote relaxation.
- Mindfulness activities: Focusing on the sensations of working with clay encourages mindfulness, allowing individuals to be present in the moment.
- Building self-esteem: Completing a clay project can foster a sense of accomplishment and boost self-confidence.
In summary, modeling clay serves as a powerful educational and therapeutic tool, enhancing creativity, fine motor skills, emotional expression, and relaxation. Its applications are vast and varied, making it an invaluable asset in both classrooms and therapeutic environments.
Ending Remarks
In summary, modeling clay offers a unique blend of artistic expression and therapeutic benefits, making it an ideal medium for artists of all skill levels. By understanding its history, the types available, and the tools and techniques necessary for effective sculpting, you can create stunning pieces that reflect your personal style. As you embark on your modeling clay journey, remember to embrace creativity, explore new ideas, and have fun along the way!
Helpful Answers
What is modeling clay made of?
Modeling clay is typically made from a mixture of natural or synthetic materials, including polymers, minerals, and plasticizers, depending on the type.
Can modeling clay be reused?
Yes, many types of modeling clay can be reused as long as they are kept properly stored and remain pliable.
How long does modeling clay take to dry?
Drying time varies by type; air-dry clay can take 24 hours or more, while polymer clay requires baking in an oven to harden.
Is modeling clay safe for children?
Most modeling clay is non-toxic and safe for children, but it’s important to check labels and supervise young artists during use.
Can I paint over modeling clay?
Absolutely! Once your modeling clay creation is dry, you can use various paints and finishes to enhance its appearance.